Non-Adhesive Wrap
Instructions for Use
Learn how to apply the non-adhesive wrap for the Sentec transcutaneous sensors.
Non-Adhesive Wrap
Instructions for Use
Learn how to apply the non-adhesive wrap for the Sentec transcutaneous sensors.
Non-Adhesive Wrap
Instructions for Use
Learn how to apply the non-adhesive wrap for the Sentec transcutaneous sensors.
How to apply the Sentec non-adhesive wrap
Watch the video or follow the directions below to use the Sentec non-adhesive wrap.
How to apply the Sentec Non-Adhesive Wrap
Watch the video or follow the directions below to use the Sentec non-adhesive wrap.
Instructions to apply the Sentec Non-Adhesive Wrap
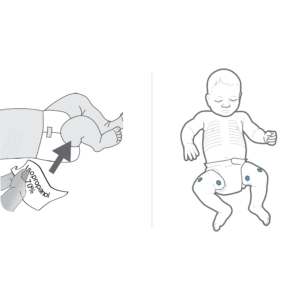
Step One
Choose a measurement site on the right or left upper thigh.
Consider how the patient will be positioned to ensure there will be no external pressure on the sensor.
Clean the skin with 70% isopropanol or water, according to hospital policy.
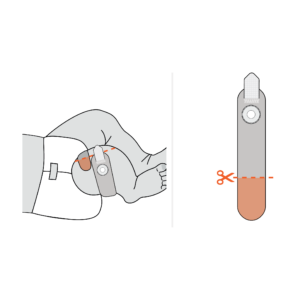
Step Two
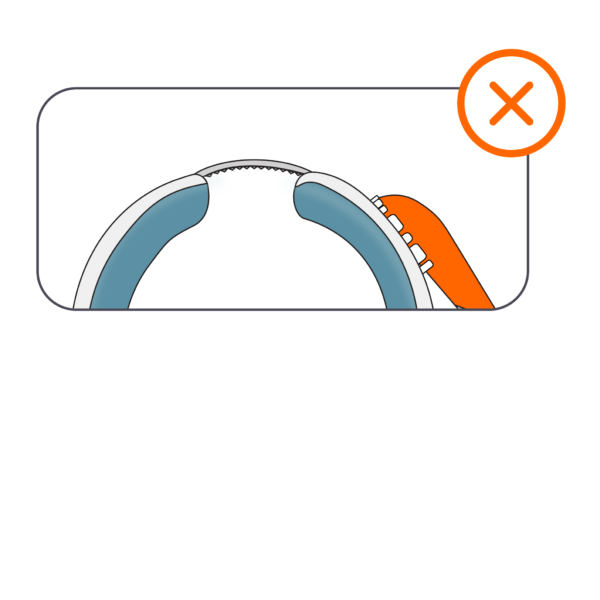
Measure the wrap around the upper thigh and cut the wrap to avoid overlap of the two ends.
Ensure that the closure tab will not contact patient skin.
TIP! Always make your first cut a little long (vs short) in case you need to adjust. You can always trim more length to make the wrap shorter.
TIP! You may find a measuring tape helpful for cutting to the correct size. Measure the thigh and add half a centimeter for your first cut. Adjust fit as needed.
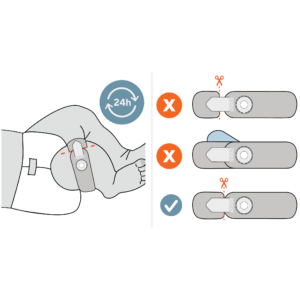
Step Three
Once cut to size, apply the wrap and fasten with the closure tab.
Check the site after applying the wrap to ensure that circulation is adequate.
When the monitor is ‘Ready for use’, remove the sensor from the Docking Station.
Do not use the product for longer than 24 hours.
TIP! Aim for a gentle but secure application. Avoid over-tightening the wrap which may decrease local perfusion and impact correlation.
TIP! While a “nose to nose” fit is preferred to prevent exposing the skin to the Velcro, it is most important that the wrap is not too tight (which may decrease local perfusion and impact correlation.)
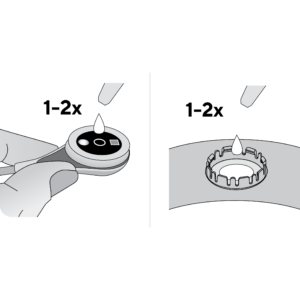
Step Four
Apply 1-2 drops of Contact Gel to the center of the sensor surface.
Keep the sensor horizontal (membrane facing upwards) so that the contact liquid does not run off the membrane.
Flip over the sensor just before inserting it into the ring.
You may also apply 1-2 drops of Contact Gel directly into the center of the attachment ring if the patient is positioned so the gel does not roll off to the side.
Step Five
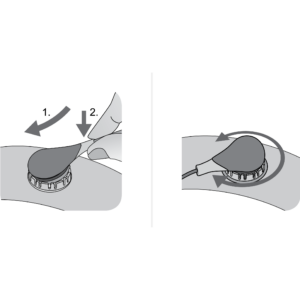
Holding the sensor at its neck, approach the attachment ring and first insert the nose of the sensor into the retainer ring.
Then apply slight downward pressure on its neck.
Rotate the sensor in the ring and press the sensor gently against the skin to spread the contact liquid.
Step Six
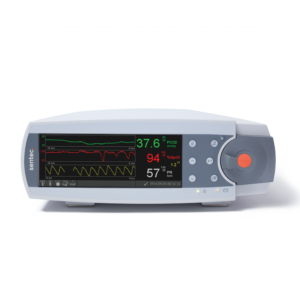
Verify that the SDM detects that the sensor was placed on the patient and the PCO2 value begins to stabilize (PCO2 value in grey).
Stabilization can take between 2-10 minutes.
If the values do not stabilize or are not rising, check the sensor application for good contact between the skin and sensor.
TIP! Continuously assess the fit of the wrap in case a change in patient condition has caused the fit to tighten (which may decrease local perfusion and impact correlation.)
Best Practices and Tips
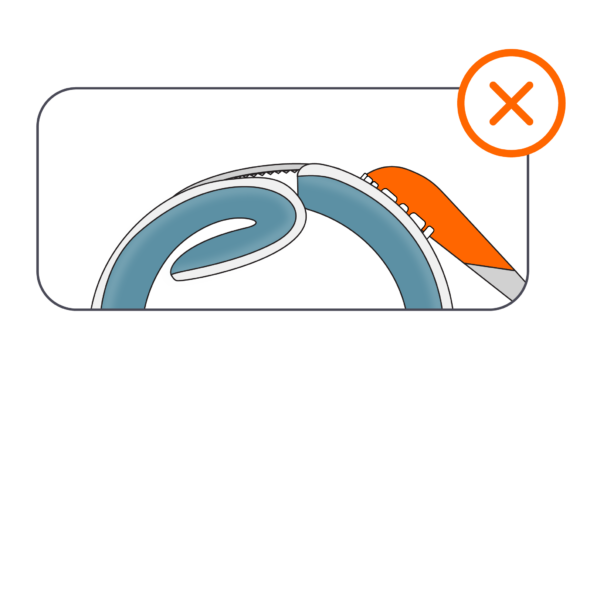
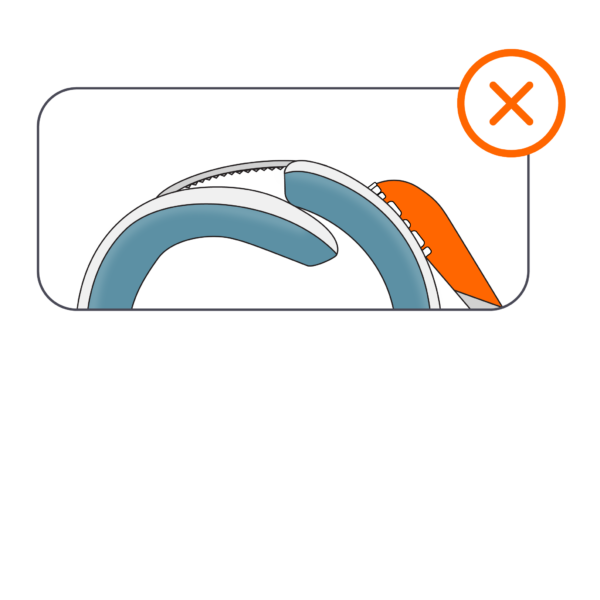
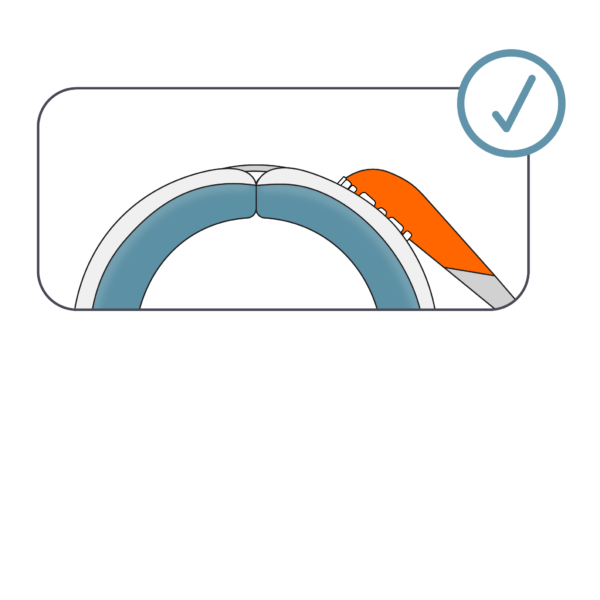
TIP! Aim for a gentle but secure application. Avoid over-tightening the wrap which may decrease local perfusion and impact correlation.
TIP! Continuously assess the fit of the wrap in case a change in patient condition has caused the fit to tighten (which may decrease local perfusion and impact correlation.)
TIP! Always make your first cut a little long (vs short) in case you need to adjust. You can always trim more length to make the wrap shorter.
TIP! You may find a measuring tape helpful for cutting to the correct size. Measure the thigh and add half a centimeter for your first cut. Adjust fit as needed.
TIP! While a “nose to nose” fit is preferred to prevent exposing the skin to the Velcro, it is most important that the wrap is not too tight (which may decrease local perfusion and impact correlation.)
Instructions to remove the Sentec Non-Adhesive Wrap
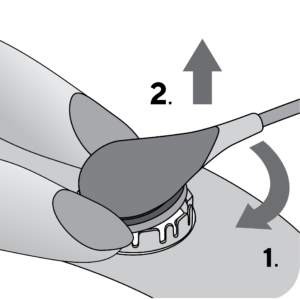
Step One
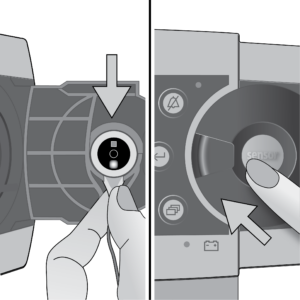
Remove the sensor from the ring.
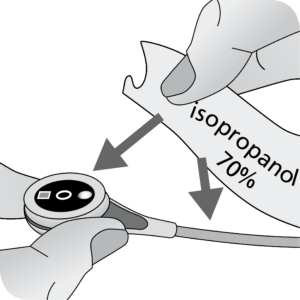
Step Two
Clean the sensor using 70% isopropanol.
Step Three
Place sensor in the docking station and calibrate.
Step Four
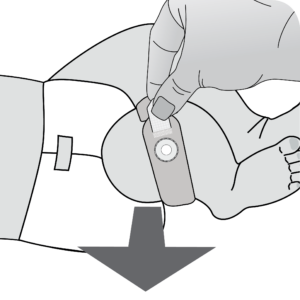
The wrap can be removed after site time has elapsed and reapplied to the opposite leg or may be adjusted to alternate the sensor position.
The wrap may be used on one patient for up to 24 hours, at which time it should be discarded.
Instructions to remove the Sentec Non-Adhesive Wrap

Step One
Remove the sensor from the ring.

Step Two
Clean the sensor using 70% isopropanol.

Step Three
Place in the Docking Station and calibrate.
Step Four
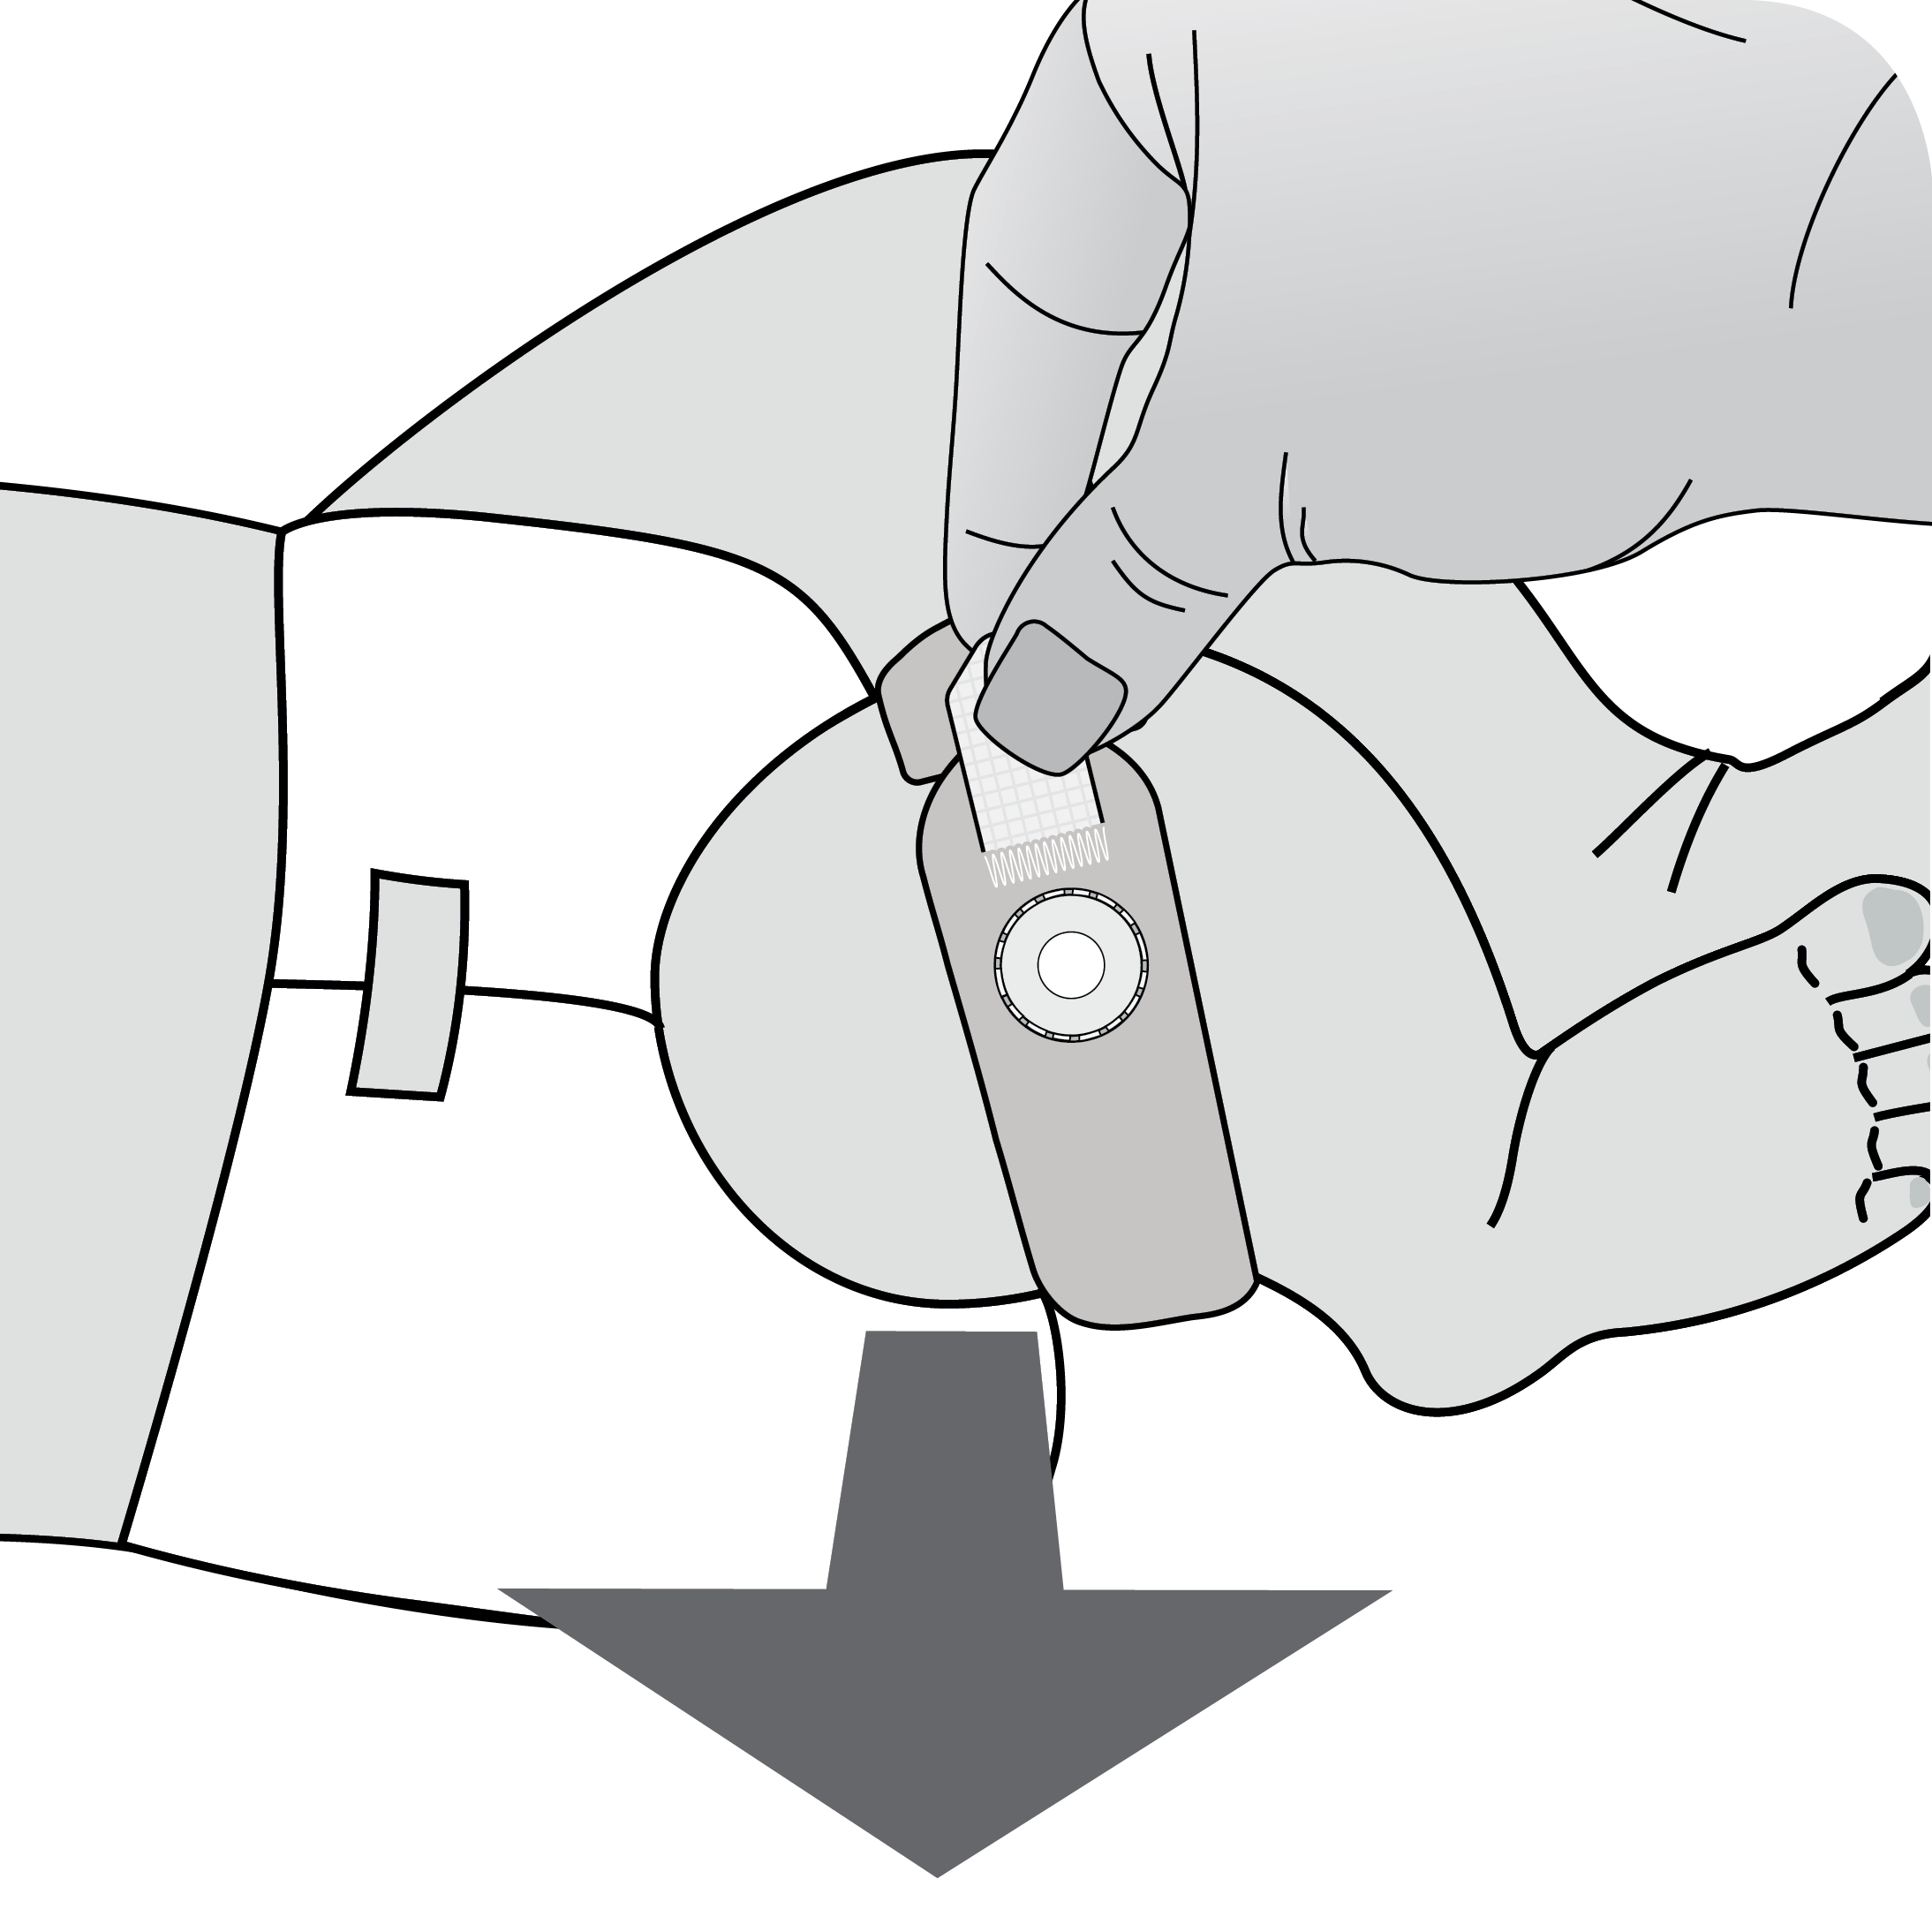
The wrap can be removed after site time has elapsed and reapplied to the opposite leg or may be adjusted to alternate the sensor position.
The wrap may be used on one patient for up to 24 hours, at which time it should be discarded.
Frequently Asked Questions about the Non-Adhesive Wrap
First, confirm the sensor location of the wrap is placed correctly. The Non-Adhesive Wrap can only be placed with the sensor on the top or inside of the thigh (not the outside of the thigh, and never on the arm). Ensure the wrap is attached securely but gently. Over-tightening the wrap may decrease local perfusion and impact correlation, causing the transcutaneous values to be too high compared to a blood gas. You can learn other correlation tips and workflows by viewing the Correlation and Relative Heating Power product support webinar.
First, confirm the sensor location of the wrap is placed correctly. The Non-Adhesive Wrap can only be placed with the sensor on the top or inside of the thigh (not the outside of the thigh, and never on the arm). Low transcutaneous CO2 values compared to blood gases can happen if there is air between the sensor and the skin. If the wrap has been in use for 24 hours, replace the wrap. The wrap’s ability to hold the sensor securely in place against the skin begins to weaken after 24 hours. Also check for general positioning, and consider applying 1-2 drops of Contact Gel if the skin is dry beneath the sensor. An “air-tight” seal is important for optimal accuracy of CO2 measurement. You can learn other correlation tips and workflows by viewing the Correlation and Relative Heating Power product support webinar.
The effect of trimming the width of the Non-Adhesive Wrap on the performance of the product has not been evaluated.
No. The Non-Adhesive Wrap is only approved for measurement on the top or inside of the patient’s thigh.
There are a number of issues to consider:
- Because our products are designed with gentle materials appropriate for neonatal skin, the connection between the ring and the wrap itself can weaken past 24 hours of use. This weakening can cause more air leaks (air between sensor and skin) to occur, leading to poor correlation. The performance of this product has not been validated past 24 hours of use.
- The Non-Adhesive Wrap will absorb some contact gel during the monitoring process. While the material is breathable, we recommend replacing with a completely dry band after 24 hours of use.
- Because of band’s proximity to the diaper, consider any infection control procedures your facility has in place, and always replace if any soiling occurs.

